By Nate Lumpkin, Crown Barista
Since we’ve all been stuck at home for months, it seemed like there was no better time than now to practice roasting my own coffee. I do most of my home cooking on a cast iron skillet that a friend gifted me many years ago, and I’d heard that it’s possible to roast coffee on one as well. All the tutorials I watched made it look like a simple but imprecise roasting method, with the potential for a lot of smoke, so I figured I’d give it a go.
Overall
This was easy to do and I got a really good cup of coffee! It’s less difficult than you might think, and less messy and smoky than I was afraid it would be. I was taken off guard by how hot the skillet got, so try using a little less heat than you expect, but be careful not to spend too much time in post development. This is absolutely an easy and accessible way to roast coffee, and the results are good as well—I recommend giving it a try!
About the Coffee
I decided to use the Peru El Arenal Yojan Pérez, a fully washed coffee which we served at the Crown earlier this year on pour-over. This coffee shows notes of cherry, strawberry, toasted wheat, and caramel, and depending on the day and roast, would sometimes show more notes of sugar browning than juiciness, and vice versa. I wanted to experiment with a coffee that would show its attributes differently depending on roast, but still be light and drinkable.
To taste these coffees, I prepared small pour-overs on a Saint Anthony C70, using 11.5 grams of coffee and 185 grams of water.
Some Overall Notes
I roasted over a gas flame on the GE Profile stove installed in my apartment. It’s a new stovetop with an easily adjustable burner. I’ve found it to be responsive and steady for cooking, but was a little worried about my skillet getting hot enough to roast coffee. In the past I’ve made candy on this stove, and had trouble getting the syrup up to an adequate temperature. However, my worries were quickly put to rest, as my skillet had no difficulty gaining and retaining heat.
I use a 10-inch Lodge brand iron skillet.
I preheated my skillet at heat 8 for about 5 minutes. I didn’t have an infrared thermometer on hand to accurately measure the heat, so when I figured the pan was hot enough I added a drop of water, and when the drop skidded across the surface and quickly boiled away, I figured the skillet was hot enough.
I was concerned about the smoke filling my apartment, bothering my roommates, and tripping the fire alarm, so I prepared by opening all the windows and putting a chair under the fire alarm so I could disable it easily. However, I found that the exhaust hood was able to remove most of the smoke, and I ended the roasts before they could get really smoky. If you roast into second crack, you might have to deal with a little more smoke.
To cook the beans evenly, I stirred them continuously with a wooden spoon, although I tried letting them rest a little on my last roast.
I cooled the beans by pouring them into a metal colander and stirring with a spoon. My main difficulty was separating the beans from the chaff – they simply wouldn’t fall through the holes in the colander, and I ended up having to pick the chaff out of the beans with my fingers. If you do this, you might want to try using a colander with wider holes.

Roast Specs
For my first roast, I kept the heat at 8 after charging the roast. Color change happened quickly at 2:30, and I was surprised when the coffee flew through color change and cracked at 4:00. Though I tried to stir continuously with a wooden spoon, I found that it was difficult to cook the beans evenly. As I didn’t have a temperature gauge, I relied on sight to determine the end, and dropped at 7:05, when most of the beans were chocolate brown, with a few golden ones among them, and a few turning oily and dark.
This coffee was surprisingly pleasant, with an aroma of strawberry and corn, and notes of strawberry, caramel, and vanilla, though the finish was somewhat harsh and bitter. I decided to try to extend first crack closer to six minutes, to give the coffee more time to development.
For my second roast, I charged the roast at heat 6. Color change occurred at 3:15, and as the coffee did not seem to be moving fast enough, I increased the heat to 7 at 4:45, and again to 8 at 6:30. First crack happened quickly after that at 7:15, and I dropped the coffee at 9:05.
I was concerned that this coffee might prove stale or flat, based on the very long time spent in color change, but found that it was really nice. It had an aroma of cherry and white sugar, with notes of carob nut, orange, and caramel. It was smooth but had a hint of tree bark. This roast turned out to be my favorite.
For my next roast, I aimed to hit first crack right at 6:00, mimicking some of the sample roasts I’ve made on the Proaster at the Crown. I also aimed to allow the beans to cook more evenly. Instead of stirring continuously the entire time, I tried to emulate a technique in cooking on cast iron, where you allow the ingredient to rest flat for a moment to allow it to cook, before separating and stirring. I charged this roast at heat 6, and then immediately after color change at 3:10 turned the heat up to 8. At first crack at 6:15 I turned the heat back down to 6.5 to prevent it from flying away, and dropped the roast at 9:05, the same time as the previous roast.
Unfortunately, this roast tasted earthy and stale. It had a delicious aroma of watermelon and cherry, but tasted like clay and cherry pit, with a sweet caramel finish. I suspect that the long post-development time contributed to this flavor profile.

Preferred Recipe
Latest Articles by The Crown

Now Hiring – Barista for The Crown: Royal Coffee Lab & Tasting Room
Now Hiring: Barista for The Crown: Royal Coffee Lab & Tasting Room Passionate about specialty coffee & service? This is for you! Barista Responsibilities: Stellar Customer Service & Beverage Excellence...
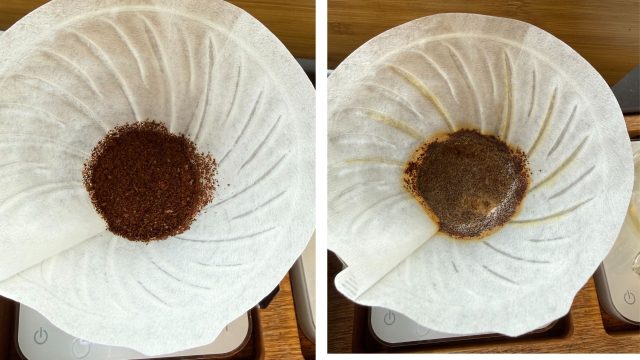
How to Master the Coffee Bloom for a Perfect Pour-Over
Mastery of the coffee bloom lies in full saturation, restrained water volume, and avoiding unnecessary extension. When done correctly, the bloom quietly sets the stage for pour-over clarity, sweetness, and...
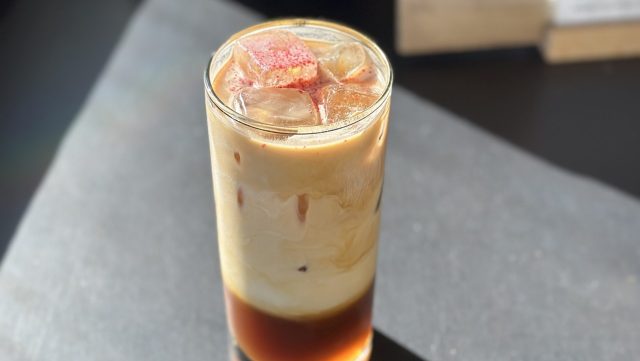
Hey Mambo! Assume Nothing Drink Recipe
By Asha Wells “Assume Nothing!” A mantra for The Crown as we worked towards opening our doors in March of 2019, the phrase became a Menu section, encouraging our visitors...